
Plan Your Routes On-The-Go!
Route Planning on the Mobile App is Here!
We’re more than excited to announce that the highly requested feature - creating and saving routes in the FATMAP mobile app - is now live in the latest update!
You can now upload GPX files or draw routes in the mobile app on existing trails or go off the beaten path and create custom routes. Select from multiple activity types and then save them and share them on-the-go.
Check out our video and step-by-step guide below on how it works, and update your app now to try it out now!
How does it work?

The process is nice and easy, follow our simple Guides below:
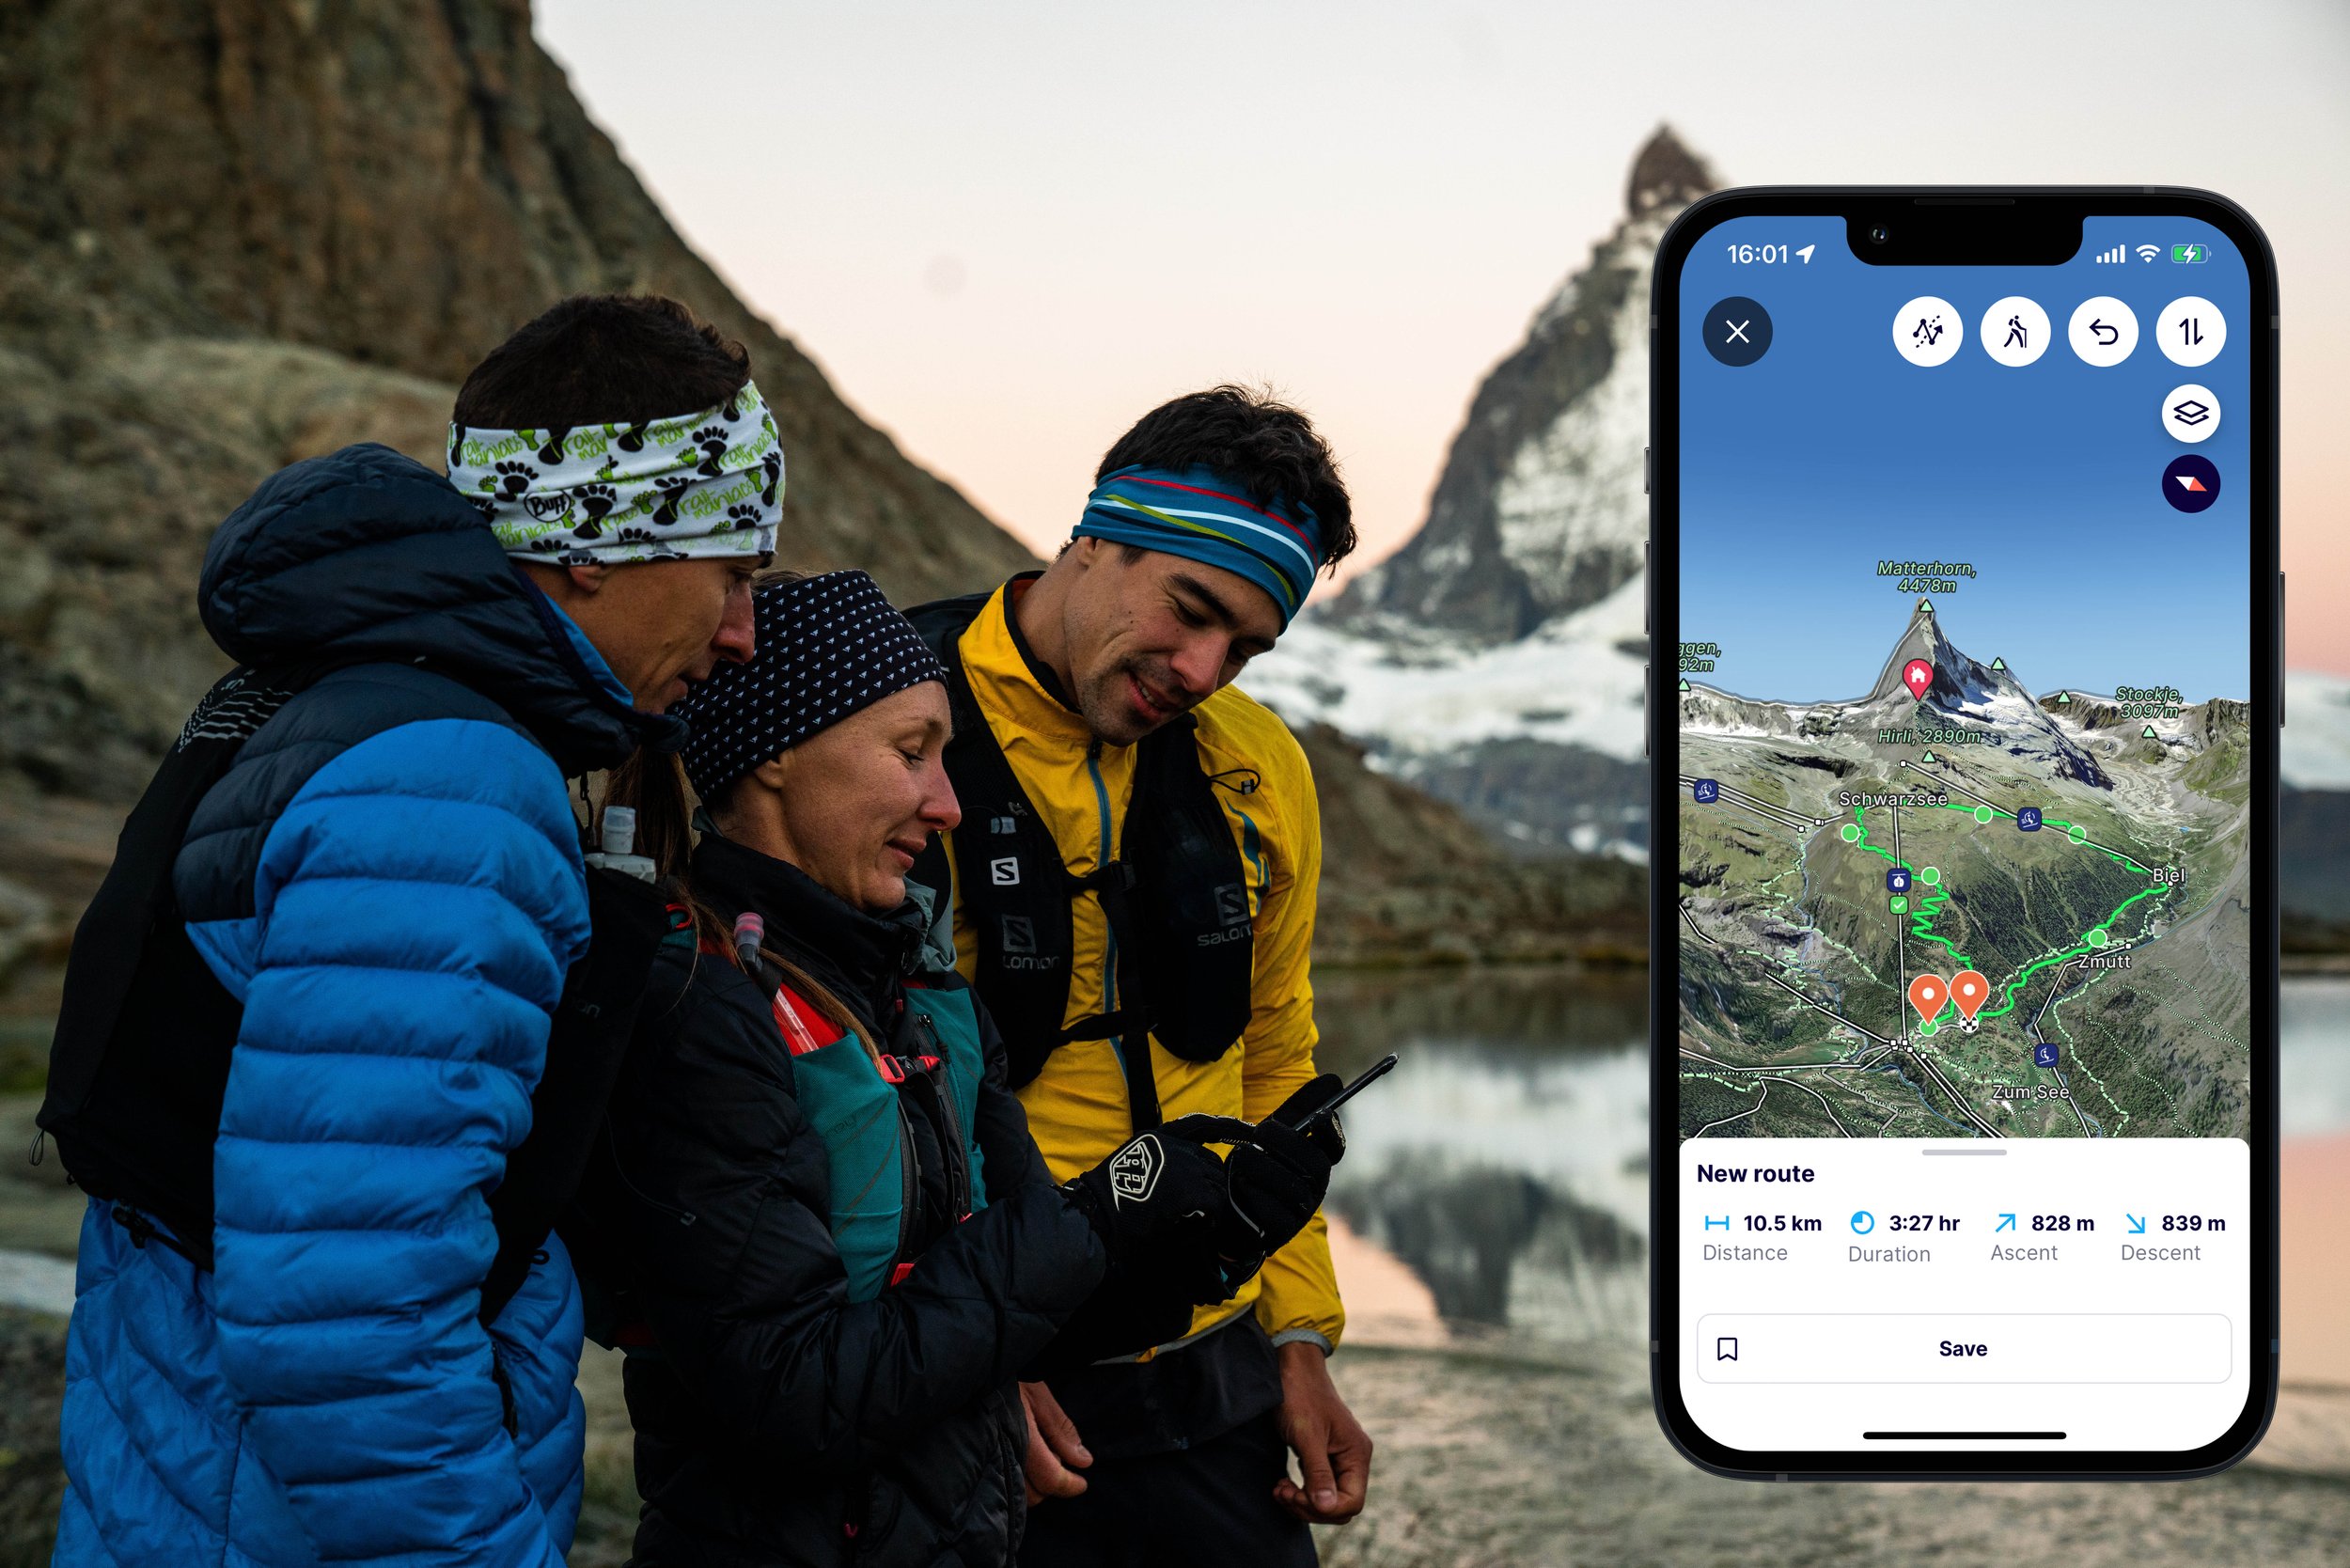
How to draw a Route on the FATMAP app
Open up the FATMAP app and head over the Map tab
You can either tap the pencil icon (top right hand-side of the screen) or tap and hold anywhere on the map and then select Start Planning a Route
On the top of the screen you will see that the default routing type is All trails (the icon of someone walking)
Tap this icon to change to your preferred routing type (All trails, Mountain Bike friendly, Road Bike friendly or Vehicle friendly)
You will see you can also tap the Custom Route button on the top of the screen, allowing you to draw your route without it 'snapping' to existing trails. You can turn this on and off whilst drawing the route, so certain sections of your route can stick to trails and others not.
Tap again on the map to place another waypoint and you will see your route will connect the two points together
You will also see the statistics of the route appear on the bottom of the screen (Distance, Duration, Ascent and Descent), along with the Save button
You can tap the Undo button on the top of the screen, to remove your previous waypoint
You can also tap the switch direction button, to switch the start and end of your route
Keep tapping on the map until your route is complete and tap the Save button when you are ready to save it
On the Save screen, you can add a Title, Description, Photos, change the activity type and choose the visibility of the route (currently only visible to you)
Tap Save Route when you are finished
You can find your route in the Profile tab on the FATMAP app, under Routes
Your saved route will also be automatically synchronised over to your account on the FATMAP website, under My Routes in your profile
How to import GPX files on the FATMAP app
Tap on the Route Planning button (a pen symbol) on the top right-hand side of the screen
Select Import a GPX File
You will now see the route on the map, along with the Distance, Duration, Ascent and Descent statistics
Tap Save Route when you are finished
On the Save screen, you can add a Title, Description, Photos, change the activity type and choose the visibility of the route (currently only visible to you)
You can find your route in the Profile tab on the FATMAP app, under Routes
Your saved route will also be automatically synchronised over to your account on the FATMAP website, under My Routes in your profile
Check out how pro skier and FATMAP Ambassador, Eric Carter, plans his adventures using both the in-app route planning and the FATMAP website in his latest video:
Notes:
In-app route creation is available to Explore Members
It is only currently possible when you have an internet connection
To edit your saved Routes, head over to the FATMAP website, and find them in your Profile
For accuracy, once you have saved a Route, we process the route's details based on our map data, meaning there will be a short delay before you see the statistics on your saved Route and they might appear slightly different than when you were plotting it on the map